Monday 30 December 2013

::Knitting:: Hope Cowl

I made a cowl.
I used up some yarn I'm not particularly fond of.
Silly time to knit as it's in the middle of summer down under.

Too hot in Brisbane for a cowl right now 

Details on Ravelry

Have you made something that would suit a different season to when you finished it? (Did that question even make sense? If it did,)  What was it?

Until next time, hope you are creating sensible things for your climate,
V xo

Friday 27 December 2013

::Sewing:: Grey on Grey Knit Shorts

Lately I've been going for walks in the morning, but I've not got many pairs of shorts with pockets that I can wear while going for walks.

I've made some knit shorts before using the Sewing with Knits Craftsy class (I just realised that I never blogged about them).

Anywho, I wear these sometimes when I go walking and because I put my phone in my pocket and there isn't much elasticity in the folder over waistband I have to keep pulling my pants up like some sort of b-grade rapper from the 90's.

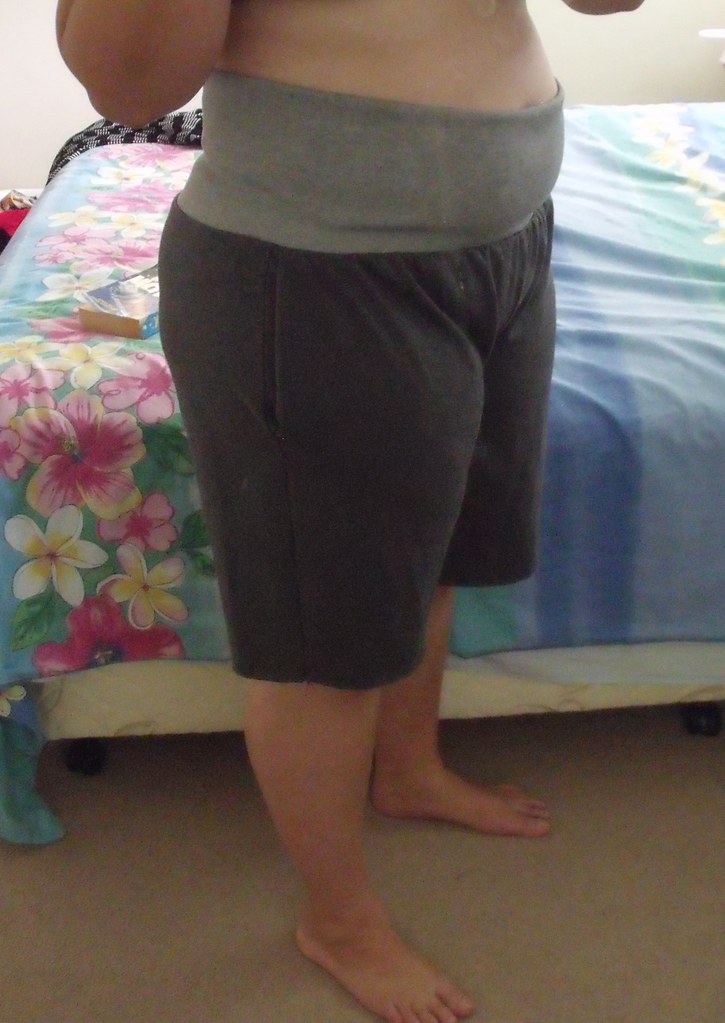
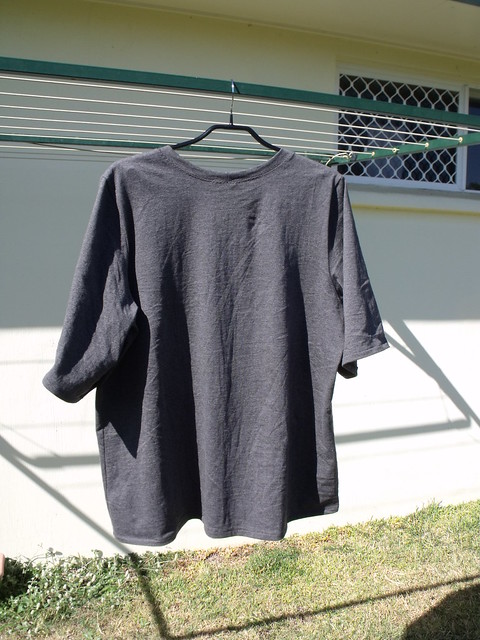
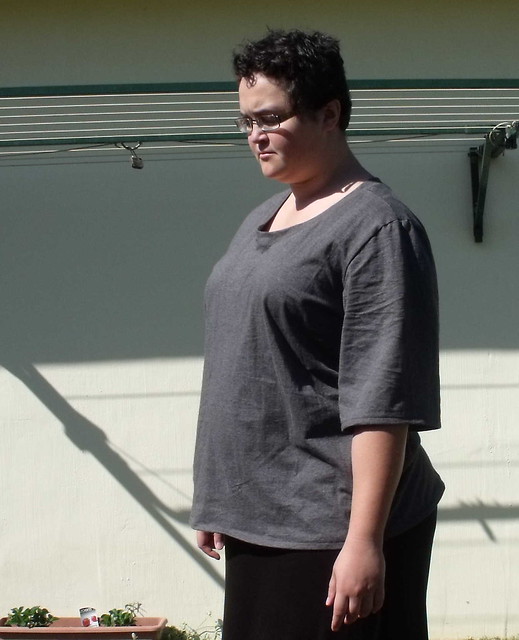
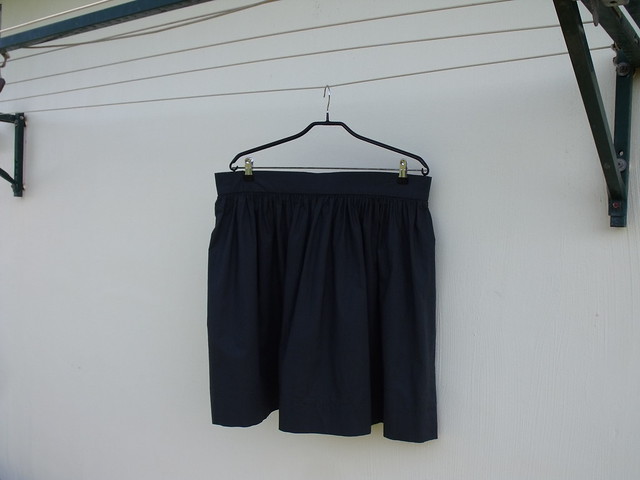
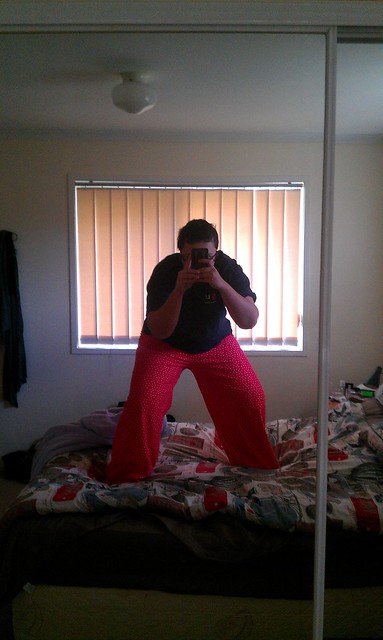
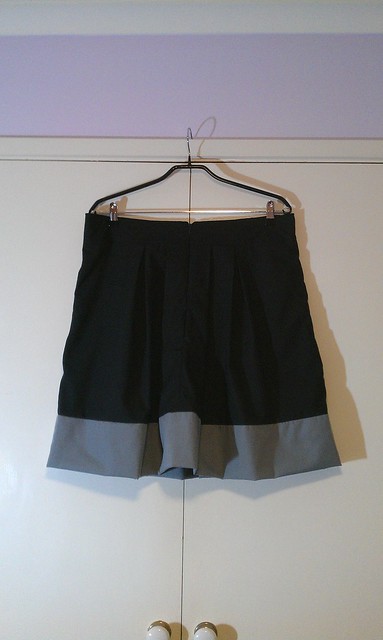
Last week I finally got my arse into gear and made another pair of knit shorts to go walking in. I call these shorts Grey on Grey....


I made these shorts almost exclusively on my overlocker (serger) which was pretty nifty because it barely took anytime. I had the shorts cut and sewn in a morning. The pressure for perfection was off because these were just for exercising so I think that added to the quick construction.

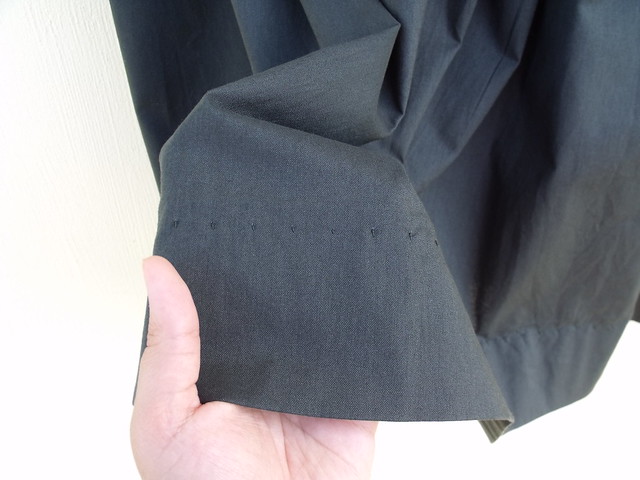
Sewing the 2 fronts and backs together was pretty straight forward although going around those curves in the crotch was a little scary.

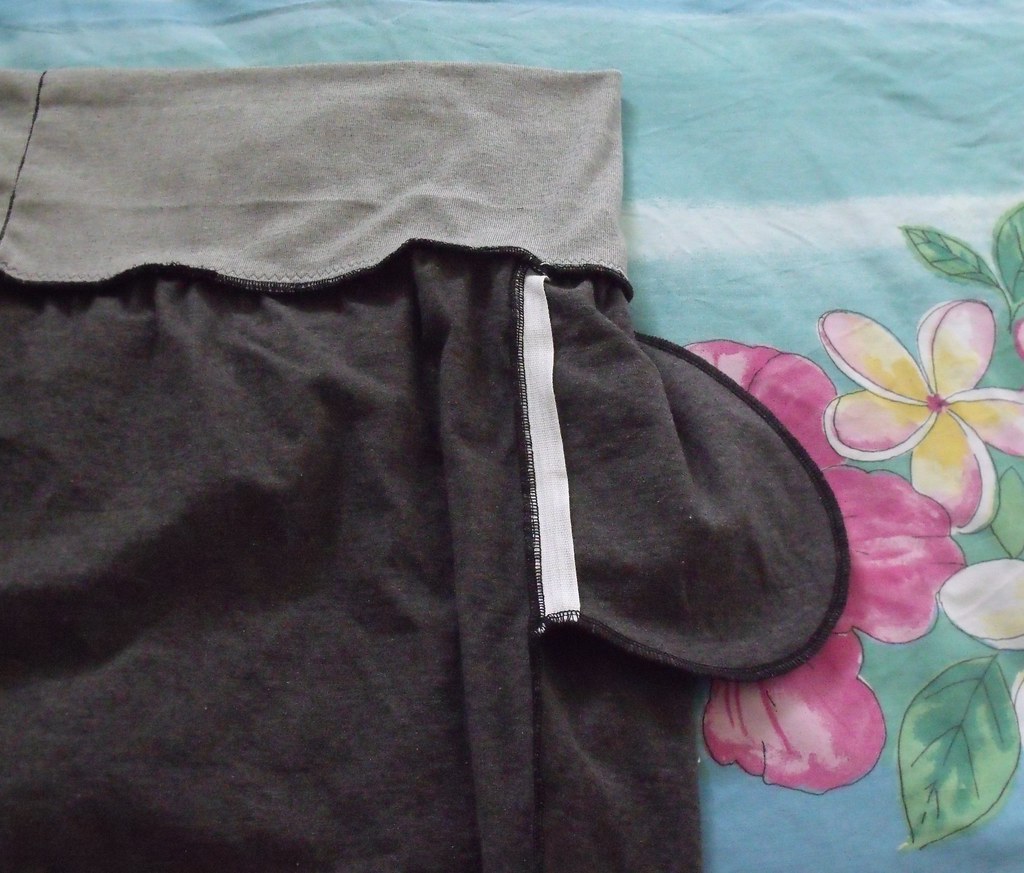
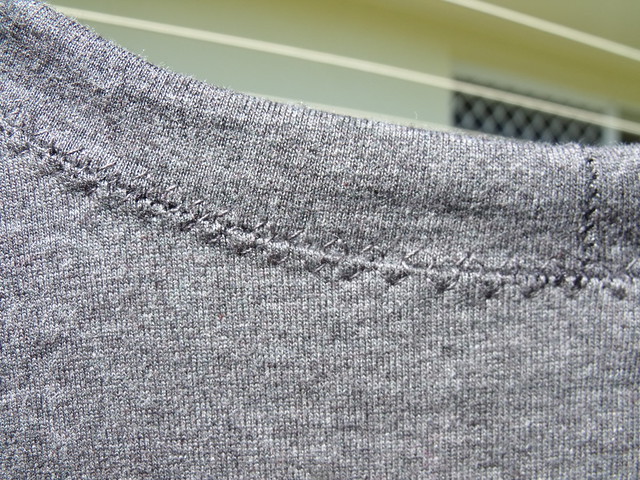
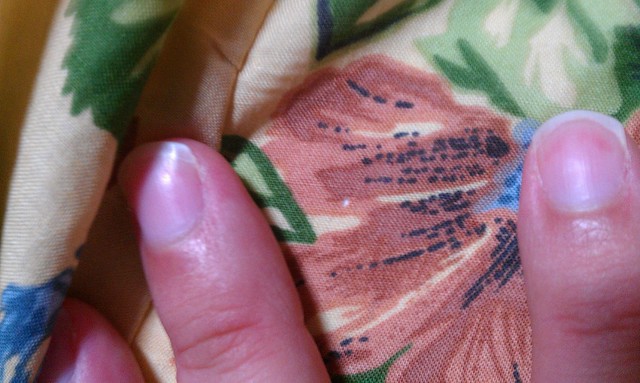
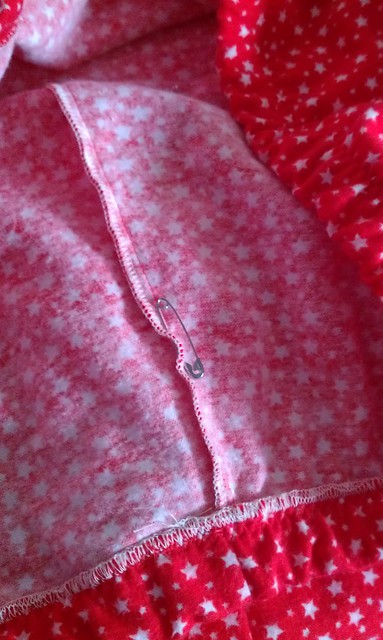
I only stablised the back pocket seams when I sewed the pockets to the sides of the short front and to the back pieces. I thought there would probably be more strain on that seam than the front and I don't mind if the front pocket seam stretches out a bit. I could have used some clear elastic, but I really didn't feel like struggling with that slippery sucker.


When I cut these out I made sure that I added some length to the top of the back crotch curve to accommodate my generous derriere... except I didn't.
As I was sewing the front and back together I realised that I had actually added length to the side seams. Gah!. Oh well. I just snipped off what I had added on and kept sewing. I did consider adding a quick band at the back to add, but that would take time and care and I was just not into that idea.


Sewing the side seams was a little tricky; having to work around the pockets and side seam there were a lot of curves.

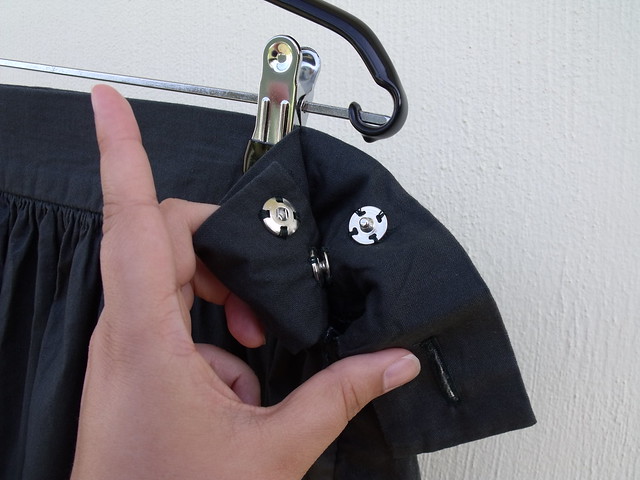
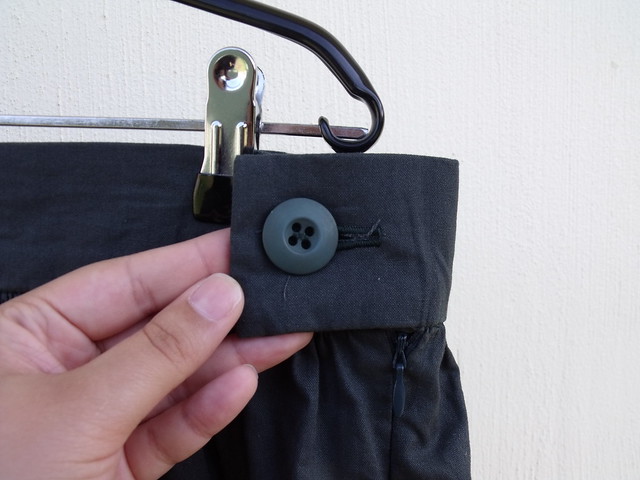
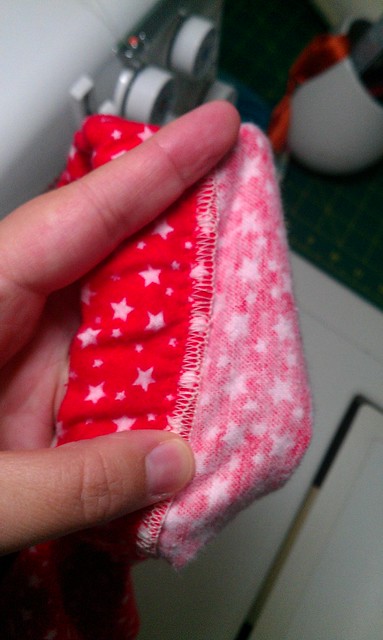
I made the waistband of these shorts out of a pre-packed band of ribbing that I bought after making my last pair of shorts. I took some 1 inch knitted elastic and measured my waist minus a few inches and pinned it then tried it on to see how it felt. I cut it to length and joined the ends to create a band. I then used the elastic band to measure and cut out the ribbing. I used the full length of the ribbing so it was pretty simple to just cut off a little bit of width off the band.
I then joined the band using the overlocker.

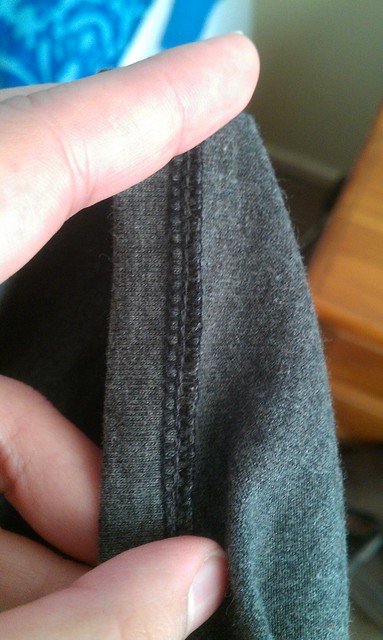
Using my sewing machine I basted the elastic band to one of the inside edges of the band of ribbing (although I guess with ribbing there isn't really an inside). then I folded the band WST to enclose the elastic.

Then I pinned the waistband to the shorts and overlocked it to the shorts. It was tough going attaching the waistband to the shorts because I had to stretch the wristband a lot when attaching it. I was also trying to match up the 2 layers of the waistband to the top of the shorts.

I had to hold all the layers taught as I put it through the overlocker. There were a couple of sections with really bunched up stitching or where I had not caught all the layers so I ended up going over those sections again, but I got there in the end.

I didn't bother finished the hems, because that's the magic of jersey :)

Good:
These were so quick to sew up and are totally a functional piece
I really like that they have pockets
I'm so glad that the waistband is a lot snugger than my last pair

Bad:
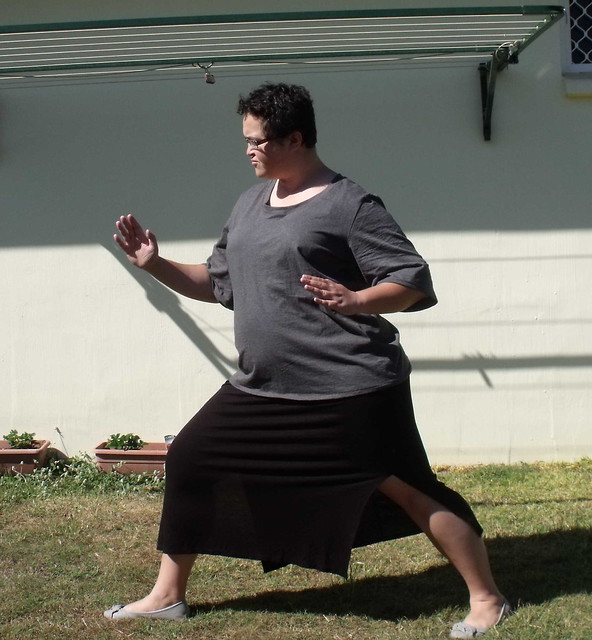
Next time I must add some length to the top of the back crotch curve
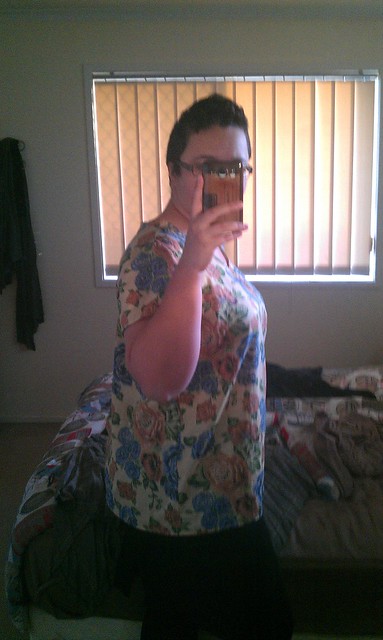
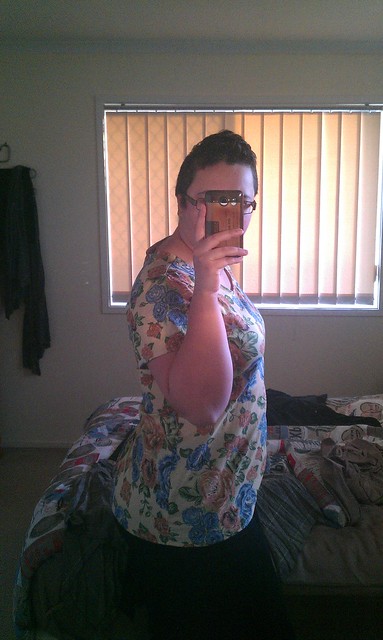
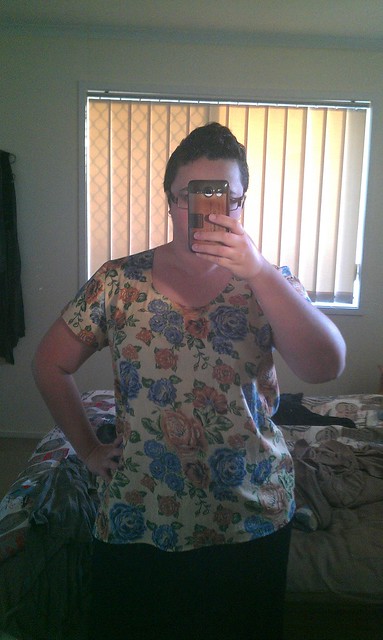
By the looks of the photos  also need to add some depth to the front crotch curve to avoid 'smiling pants' syndrome


Overall:
But all in all not too back for a mornings work and I have some great walking pants that I don't have to worry about falling down.

Do you sew the clothes you exercise in? Do you like working with knits?

Until next time,
V xoxo

Thursday 26 December 2013

::Show & Tell:: Morning After...

Happy Boxing Day!

I hope you had a Merry Xmas Day filled with good company, good food, good presents and a nana nap :)
I had a pretty low key Christmas as the in-laws where we had lunch/dinner.

Unfortunately I forgot to take photos. Doh! But we arrived around 10:30am and once settled in we sat around for a bit.
After awhile we roped Mr S 4yo nephew to help with making gingerbread from a dough that I had made the day before.
Not long after we had lunch and after that it was the obligatory quick clean up and food coma lounging. After a couple of hours we went into the pool for a dip.

We lounged around some more (gotta love some food coma lounging)
After looking at cocktail book the OSIL (Older Sister-In-Law) had brought we decided that we should make a cocktail.
Lucky for us we only live 10 minutes from the IL's (In Law's), so the OSIL and I quickly drove home to get our collection of half-filled bottles of liquor.

When we got back we concocted a grasshopper - delicious!
By the time we had done all that dinner was nearly ready so we got to enjoy our cocktails with dinner.

For dinner we had leftovers and just couldn't fit in another morsel so we didn't get to eat the pavlova that day. Not long after that we went home, had a shower and went straight to bed. It was 9.30!

So all in all pretty enjoyable and chillaxed.

For Christmas I got a bottle of Malibu from Mum & Dad and a 'Coco avant Chanel' DVD from Mr S (meaning that I bought it and he wrapped it :) )


I got a butane torch and a marble slab from the in-laws. I'm sure they'll come in handy.

But the big ticket item for the year was motorcycle helmet from Mr S. I got my motorcycle licence aaages ago, but I  haven't bought any gear to wear while riding so I haven't been on a bike since I got my licence. So on the weekend Mr S and I went and bought a motorcycle helmet.

This helmets really great because it's designed to be worn by people who wear glasses and the most exciting bit is that there is an in built sun visor :-O

Anyway, Xmas is not all about presents....it's about food too :).

I made a bunch of rum balls and a pavlova to take to the in-laws for lunch/dinner. I've only ever made a pavlova once before. I had a few booboos with my pavlova so it had a VERY rustic look about it :)


The rum balls were a massive hit (mainly with my older SIL and myself), but we didn't get around to eating the pavlova.So I ate some today with whipped cream and tinned fruit salad - YUM!....

This morning (Boxing day) we quickly went around to the IL's and collected all the stuff we took over yesterday. Other than that we are just pottering around the house. I'm hoping to get in some sewing/blogging this afternoon. So we'll see how I go... :)

What did you get up to? 
Did you get some goodies under the Xmas tree?

Until next time, hope you're having happy holidays,
V xo

Wednesday 18 December 2013

::Sewing:: Great British Sewing Bee - Christmas Special

I just watched The Great British Sewing Bee - Christmas Special and I was so inspirational and fantastic that I had to share.

Grab a cuppa and a treat and pop this on and take a bit of time to get totally inspired for this festive season!


I was so taken with the clam shell decoration that Stuart made (around 30 minutes into the video) that I've found a video with some great tips on how to make one using the Clover Clam Shell Accessories Cases kit. (If I make them, I'm going to try making them just using cardboard instead of with the kit. Wish me luck!)


Do you think there are enough sewing shows on telly?  I wish there was more on Aussie TV.

Until next time,
Enjoy a dash of GBSB Xmas goodness : )
V xoxo

Saturday 30 November 2013

::Sewing:: Reflection on 2013 S.W.A.P and Sewlution


Where the heck is 2013 going? How is it nearly December?

So have I gone with my 2013 S.W.A.P and Sewlution. After all that thought and planning have I fallen flat on my face? I've ticked a couple of things off my S.W.A.P. list and I've reached my Sewlutions goal ;)

Some quick notes about how I've done...

S.W.A.P.

After review several factors like colouringbody type and lifestyle I wrote a Wardrobe Plan
I think I was very ambitious considering how little I sew.
Nonetheless the plan was as follows:
4 work tops
  • Colette Sorbetto
  • Portrait Blouse I made one, but it wasn't a great success I haven't posted about it
  • Colette Violet 
  • Taffy Blouse 
4 work bottoms
  • Drndle Skirt DONE-Post here
  • McCalls 5591 - View A  DONE-Post here - Gave it to my mum.
  • Sewaholic Hollyburn Skirt 
  • Ginger Skirt 
  • Maybe: Jenny Skirt 
1 work dress
  • New Look 6723 - View A 
2 casual tops
  • Colette Sorbetto 
  • Scout Woven Tee DONE-Post here
2 casual bottoms
  • Sewaholic Hollyburn Skirt DONE-Post here 
  • BurdaStyle 06/2011-Skirt with front pleats #117A
1 casual dress
  • Dixie DIY Ballet Dress
1 sleep top & 1 sleep bottom & 1 slip
  • Colette Sorbetto 
  • Tap pants (Lazy Stitching's Tutorial of adapting the Free Madeleine Bloomers into tap pants)
  • Ruby slip (Pattern Scissors Cloth Free Pattern and Sewalong)
And a few bonus items
  • 1 bolero
  • 1 singlet
  • 1 undies Well kinda done - I made a test pair-Post here
So that's a total of 17 garments (not including the maybe or bonus items).
How did I go? Well I made 6 items, but I'm only wearing 4.
But.....

Sewlution

The challenge I set for myself was to sew 9 garments in 2013. To help keep my eye on the prize I made a poster for my Sewlution (I think I'll make one for my S.W.A.P too)


So how many garments have I sewn?
  1. Casual Hollyburn Skirt (in high rotation in my wardrobe)
  2. Portrait Blouse (not blogged and not worn)
  3. McCalls 5591 - View A (gave it to my mum)
  4. Craftsy Knit Shorts (not blogged, Wasn't on my S.W.A.P. list but I wear them frequently)
  5. Undies - Test pair
  6. Casual Scout Woven Tee (in high rotation in my wardrobe)
  7. Pyjama bottoms (Wasn't on my S.W.A.P. List, and wore them frequently in winter)
  8. Olive Drndle Skirt (in high rotation in my wardrobe)
  9. Knit Scout Woven Tee (in high rotation in my wardrobe)
  10. (ETA 28Dec2013) Grey on Grey Knit shorts 
I've sewn 910 garments, not all of them are being worn, but that's ok. You can't win them all!
I'm hoping to sew more before the end of the year, but we will see as the silly season is upon us!

How have you gone with your creative goals this year?

Until next time,
V xoxo

Saturday 12 October 2013

::Sewing:: Grey Jersey Sleep Shirt


I wanted to make a basic knit shirt to practice knit techniques so after seeing amazing knit versions of Grainline Studio's Scout Woven Tee about the place I thought that would be a great place to start.
While cutting out I lengthened the sleeves.

While Overlocking the shoulder seams and used some cotton tape to stabilise the shoulders. I experimented with clear elastic, but I think to make it work I would have had to baste it on my sewing machine first so it didn't slide and stick as I put it through the overlocker. My inner lazy dressmaker turned me off that option.
The only thing was when it came to sewing the sleeves on it was a bit bulky. That's ok though. I'm not wearing this to see the queen or anything (except maybe in my sleep) so no biggy.


Attaching the sleeves was a bit of a pain, but it usually is with set in sleeves. I overlocked the sleeves at the armhole, it was pretty simple just needed to make sure I matched the notches and pinned liberally.
The sides came together pretty easily, just a bit of pinning at the underarm seams and whizzed it through the overlocker.

The trickiest part was the neckband. I made it an inch shorter than the pattern piece for wovens, but I probably could have made it another 1/2 to 1 inch shorter again. Even if it's not perfect I'm still pretty pleased with the neck band, its not too flippy-outty (that's a technical term). Attached and then stitched from right side using a stitch in the ditch foot as guide to centre the stitching.
 

Hemming was done just by overlocking the edges, turning 5/8 inch then stitching down using 3 step straight stretch stitch on my sewing machine. In an attempt to get a straight I used the straight stretch with the needle aligned to the left and the hem fold aligned to the right side of my presser foot.
 

It's quite a warm tee. I'll probably get a little wear out of it before summer, but I don't think it will be my sleeping attire of choice in late spending and during summer.

So that is my first foiree into stretch tops. I was not too scary, and I've ended up with a nice big baggy sleeping shirt. That I can pose like a ninja in....

If I were to do it again, I'd make the sleeping shirt longer and probably use a different hem treatment because after a bit of wear the hems tend to flip out. The next time I go to my local sewing shop I'll pick up a ballpoint twin needle so I can attempt a twin needle finish on my next make.

Have you made something out of knit fabric recently? Where do you get your knit fabrics?

Until next time,
V xoxo

Friday 27 September 2013

::Sewing:: Olive Drndle Skirt


Ever since I started sewing again a couple of years back I've wanted to make a Drndle skirt. I finally got around to doing it recently.
I bought this olive green broadcloth aaages ago. I didn't have any specific plans for it, but it was one of the colours from my colour palette after my analysis.

The basic steps of construction were as follows:
Cut fabric
Interface the front half of the waistband
Baste 3 rows if gathering thread at top of skirt pieces
Gather the skirt pieces
Stitch cotton tape to back of gathering
Insert invisible zipper
Overlock waistband edges
Create little tag
Attach waist band front
Stitch each waistband tab
Stitch on the ditch between skirt and waistband (catching back of waistband at the same time)
Sew button hole
Attach button
Attach snaps
Hem with blind hem stitch

I created a little loop to act as a tag of sorts as I like having a quick reference to know how I should be wearing my clothes.


I attached the snaps to make it waist to put the skirt on as the snaps are quick and simple to attach the skirt before buttoning  and zipping.


I have recently been trying to avoid shopping for creative supplies as I tend to buy a lot of "necessary" extra items.  I'm frying to stash bust and bring some of my sewing plans to fruition.  So the button I used came from a button value pack.


I used the blind hem stitch on my sewing machine.  The stitches pull, probably because its a double tum hem. I can handle it, considering I was in a hurry to finish it.


I was jumping on a plane to go on a holiday the next day.

l specially ironed for photos because being cotton she wrinkles like  a bloody prune!

Tell me about a time when you completed a project you've been meaning to do for ages.

Until next time, I hope you are bringing some of your creative plans to fruition.
 V xoxo

Tuesday 30 July 2013

::Show & Tell:: International Craft Swap

I got a lovely surprise in the post a couple of Fridays ago. When I got home from work I found a pink parcel with a British Post label had arrived.


As much a as I wanted to rip it open to see what goodies had arrived I had to wait because Mr S and I had to go to a birthday dinner for his sister.
When I finally opened it the next day I found these goodies inside.(the notebooks had fallen out :))


She sent a handmade notebook binder and ribbon bracelet.
There is also a notebook, pencil case and a smaller notepad + pen and a pad of small sticky notes.
The notebook cover is embroidered with my initials, the name of my blog and there is a design on the front in homage to the omiyage flower pouch I have as my avatar.


It was the International Craft Swap parcel from Catherine from At the Macx. Back in February Rachel of Houseof Pinheiro organised an International Craft Swap.[http://houseofpinheiro.blogspot.co.uk/2013/02/international-craft-swap-join-me.html]

This is what I sent her back in mid April.

A cool little container made of fabric

A little coaster

ring made from a cute little button

Classic brooch

Here it is all boxed up ready for shipping (I threw in a box of Tim Tams!)

Swaps always fill me with self doubt. I always think, 'Is what I sent good enough?'.
I'll just have to get over myself :)

Anyway, big thank you to Rachel at House of Pinheiro and Catherine for this swap experience.
Until next time, I hope you are getting nice surprises.
V xoxo

Thursday 4 July 2013

::Sewing:: Scout Woven Tee with 1 sewalong for me please

This was a dream to sew up. I made it over a couple of weeks. I did a couple of a adjustments though. I lengthened the pattern by 3 inches and I cut a 16 at the top and graded to an 18 from under the armpits to the hips.

I sewed it up a bit differently to the pattern. I sewed and overlocked the shoulder seams. Then using a beige store bought bias binding I bound the neckline. If I had used bias tape from the pattern I would have used this method of attaching the neck binding.


I set the sleeves in in the flat and overlocked the seams. I made a little booboo though, while I was overlocking one of the sleeve seams I nicked a tiny hole into the back shoulder. It was only a tiny nick I put some fabric glue on it and I'll see how it holds up.


The only other time I've set in a sleeve was when I did a muslin for this top at the end of last year. I think I prefer setting in the sleeve flat. In this case it worked pretty great even though I got a couple of tiny pleats while easing them in.

I basted the side seams to check the fit and it was ok. If I had made the fit more snug it would have been hard to put on and take off. Once I decided it was going to fit alright I removed the basting I sewed and overlocked the side seams and and hemmed the sleeves and bottom.

To hem I folded and pressed the hems at the finished length then folded the raw edge into the fold, pressed and sewed.

The fit of the shirt is a bit loose, but I think that's just the style. It's not getting much use at the moment being winter and all, but I can see this getting a lot of wear in summer especially as it's loose, light and airy. A great addition to my casual summer clothes. Although, I could probably layer this top on top of a long sleeved knit top.

From the side
From the side
- pulled taught

The fabric is a little stiff still but hopefully it will become a bit softer and drapeyer with wash and wear.
I'm popping this into the Sewalong on Kollabora. Not long after I had gotten the pattern and fabric out to make it Nettie from Sown Brooklyn announced her Sewalong.

From the front
Fom the front - pulled taught

So that it that. I will probably make this again in the future. I might even change it up a bit at take some inspiration from this (I'd made the overlap at the back) and this version (Like the colour blocking and the button down back) as it would mean I might be able to get a snugger fit..

So there you go, another garment I can add to my Sewalutions tally and my S.W.A.P. wardrobe.

Until next time, I hope your making things that you want to and ticking off some to-do's,
Vanessa xoxo

Thursday 27 June 2013

::Sewing:: Pj trousers for Pyjama Party '13

I've been wistfully reading along with Karen's Pyjama Party Tofino Style posts.
I wasn't going to play along even though I'd already bought some lovely flannel to make a pair of pyjama trousers as the ones I made last year get so much wear in winter.

I really wanted to buy Sewaholic's Tofino pattern when it first came out, but couldn't justify it. I really like this version from Suzy Bee Sews with pocket built onto the side panel. POCKETS! You know how I feel about pockets :) The tutorial for how she added pockets is here.

So I thought I'd sit out for this pyjama party and play along at my own pace. But...after seeing all the posts about pyjamas in the blogosphere after the pyjama party launch I couldn't not join in.

So last night I laid out my fabric on a freshly vacuumed carpet and cut out the pattern I used for the last pyjama party. (Note to self: cutting fabric on carpet is dumb!) Snip, snip!

I chain sewed the inner leg seam (there's only one leg seam on each leg. Totes awesome if you need to whip up some pyjama trousers in a jiffy). Zoom, zoom!

I chain overlocked the leg seams.  Brrrm, brrrm.

I did the same for the crotch seam. Zoom, brrrm!

When I went to try them on. I stopped. Which way was the back? I'd overlocked the crotch seam without thinking to mark the back (or front for that matter) in an obvious way. Gah!

I took my pattern out again and compared the shape of the crotch curves and decided which way was the back and stuck a safety pin in the back seam allowance to mark the back. (I'm pretty sure I've made that mistake every single time I've used this pattern. Derp!)

This is the back Vanessa. The Back!
I tried them on and they fit like a dream through the leg. I marked where I wanted the waist top to be folded over and pressed. (To make my pants sit level I needed to remove more from the front than the back. Hmmm interesting. The signs of the need for Full Butt Adjustment/Swayback Adjustment me thinks.)

Woohoo! Halfway there! All I had to do was to elasticise the waist and hem the bottom. It was getting on in the evening and I had to get some sleep.

This morning I was laying in bed pondering about how I was going to attach the elastic in when I remembered this post from Sarah at Sew Squirrel which led me to Melissa's fehr trade post.

Overlocked and tricot stitched waistband.
Using only the LH needle I overlocked the elastic to the WS of the waist. I aimed the elastic to the marker for the RH needles so that it wouldn't get chopped up by the blade. Then I turned it down on the WS and tricot stitched it down. No twisty elastic for me HAH!

If I were to do this method again I would overlock the waistband to the RS of the waistband then turn in to the wrong side and then turn it under again (does that make sense?) That way the elastic would be completely concealed. It may create a bit of bulk, but with pyjamas, it's probably not that big a deal. (Or maybe flatlocking could help reduce bulk. Hmmm.)

Anyway, I wanted to take pictures in natural light so this morning after I'd attached the waistband I took a couple of piccies. One of the few times when the only full length mirror in the house happens to be the mirrored wardrobe doors in your bedroom :)

Bounce!
Finally, these evening I hemmed my pyjamas and I'm wearing them RIGHT NOW! And they are lovely and flannely and cozy and lovely. And I'm sooo glad I made them! And that my friends is how you go from 'Nah, I'll sit this one out' to 'Hey, hey! I've made pyjamas too!' in 48 hours :)

So now that I'm finished I'm gonna link my red fabric with white star clad butt up on Karen's Pyjama Party Launch post.

Until next time, I hope your getting involved with things that make you cozy.
Vanessa xoxo

Friday 21 June 2013

::Sewing:: First Pair of Undies

A long while ago I downloaded Zoe's undies and vest pattern. I bought her a cup of coffee for the privilege of using her undies pattern.

I bought some jersey and I wanted to make something NOW.
So I printed the pattern out and stuck it together (I did the Colette Laurel dress pattern at the same time. I haven't done anything with that yet but its ready to go when I am!) I cut out the fabric and sewed it up. I used my sewing machine, even though I have an overlocker. I thought for my first go I'd be better off not involving a cutting blade just yet.

I  didn't want to sew the elastic to the leg holes then sew the side seams. I wanted a smoother finish than the end bits of elastic poking into the inside. So I sewed the side seams then attached the elastic.


I tried them on and learnt a lot. So what did I learn?

Lesson 1: inserting elastic into a stretchy leg whole is interesting (read: fiddly as s###). 
I sewed the elastic flush with the raw edge using a zig-zag stitch then turned it under to the inside and sewed it with the tricot stitch.

Looking at some RTW undies it looks like they sew the elastic on, then sew the side seams then flatten out the elastic edges by stitching them flat to the inside. I'll have to remember that for next time.

Lesson 2: fabric and direction of stretch are very important
I read Rachel's post  which made me think of the direction of the stretch. That is why the undies seemed very low rise.
I also think that next time I cut out fabric for undies I'll have to take the method of attaching the elastic into considerate. I think I probably lost a fair amount of fabric using the stitch turn stitch method on this trail pair of undies.

Lesson 3: you have to make your elastic work for its keep
I made my lengths of elastic too long so they weren't keeping the fabric snug.

Lesson 4: I like a full coverage
Namely over my derrière and therefore/also sides that that come lower over the upper leg region. I think I'm aiming for a mid rise boyleg/granny pant.

That was my short foray into underwear sewing. All in all not a raging success but still a bit of fun and lots learnt. I'll try again one day. But not any time too soon.


Cheers,
Vanessa xoxo

Thursday 6 June 2013

::Sewing:: McCalls 5591 for my Mama

I have a black skirt that I just adore. ADORE! I’ve had it for years and years and I’m starting to see the effects of years of weekly wear take it’s toll. :(  She is my BBS (Best Black Skirt) and I think it she finally gave up the ghost I would be truly lost and dazed.

In my travels I came across the pattern McCalls 5591. It looked similar to my BBS with the bonus of having pockets to boot!

At the beginning of the year with the added motivation of my Sewlution pledge I started on a skirt. I made it up almost to the end when I realised it just wasn’t going to work. My ample derriere made the skirt sit strangely. I’ve come to realise Me and side zippers are bestester friends than me and back zippers. That and pleats in the back didn't work so well.

I think there was probably a dire need for a titch of grading and perhaps a Full Butt Adjustment (although, how the heck do you do a full butt adjustment on a pleated skirt :S) and the fact the skirt was made out of cotton poplin probably didn't help either.

So the skirt that was meant to be my new BBS sat sadly in my sewing space for some time... Until my mum was in town visiting me and she spotted it. The conversation that followed went something along the lines of...
Mum: “What’s this?”
Me: “Oh just a skirt I was making that didn’t work out. Try it on if you like.”
Mum: “Oh. It fits alright.”
Me: “Would you wear a skirt like that?”
Mum: “Yeah.”
Me: “Well then I’ll finish it and give it to you.”
Mum: "Ok, but can you....."
And thus followed a couple of adjustments she wanted me to make, like put the zipper in the back and not make the hem too big.

That was back in early February. I chugged along slowly on finishing the skirt, but then mothers day was around the corner and dad was going to be in town a bit before so I could give it to him to take back to mum. All the stars aligned and I had to get the skirt done so mum could have it for mother’s day. I finished the skirt not including the bottom band as mum had said that she didn’t mind it being that short. But after finishing and hemming it I thought it was a bit too short....especially considering it was for my mother!


So I decided that I would use some grey fabric I had on hand to add a band to the bottom; as it did in the pattern anyway. At least the skirt could still be a neutral that could be worn with a variety of tops.

The back seam did some creepy wrinkle thing that made it slightly shorter at the back, but other than that the skirt was good to go.

That my friends is the tale of how my mother got herself a black and grey skirt sewn by me. She wore it on Mothers day. I don't have any piccies of it on her, oh well. you win some you lose some.

This skirt is going in the Sewlution Tally so booyah! I will try my hand at making another black skirt to replace/supplement my current black skirt fave but I've got other things on my radar at the moment. All will be revealed..... :)

Until next time, I hope you're finding some successes in your not so successes,
Vanessa xo